Making a scratching post for your cat
SCRATCHING, A NORMAL BEHAVIOUR
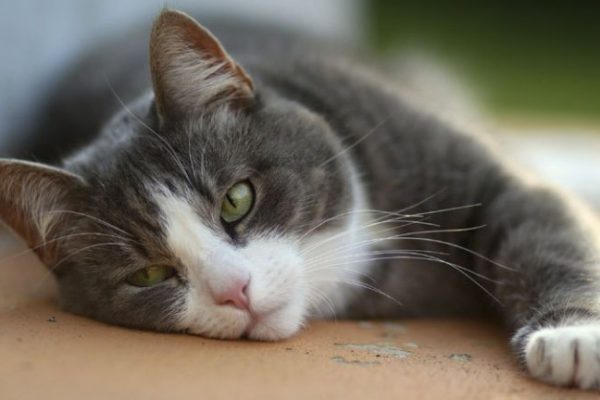
To maintain their physical and mental balance, your cat needs a healthy outlet to engage in normal cat behaviours like scratch marking. We sometimes refer to this as “sharpening their claws.” This everyday behaviour helps cats:
- Sharpen their claws and remove any frayed parts
- Communicate and convey different kinds of information to other animals
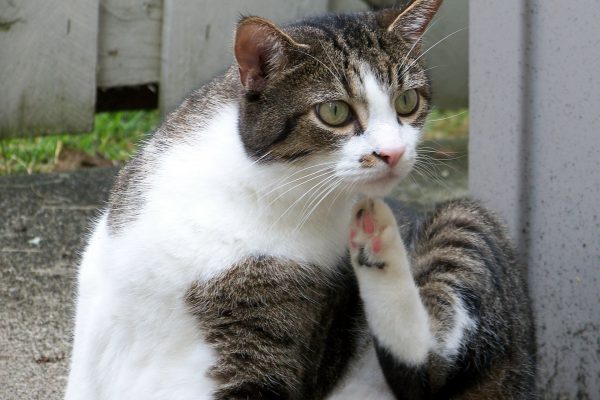
Cats also use their claws to:
- Grip things and stretch their muscles
- Defend themselves and keep a potential threat at bay
TIPS TO GET YOUR CAT TO USE THEIR SCRATCHING POST
You probably don’t want your cat to sharpen their claws on your beautiful couch. To keep this from happening, you should have surfaces in your house that your cat can use to express this normal behaviour.
Below are some simple rules you can follow to encourage your cat to use their scratching post. It would be a shame if you made your kitty a great scratching post and they weren’t interested in it. To keep that from happening, your scratching post needs to be the right texture, size, and shape. Where you put it and how you encourage your kitty to use it are also key. For more information on this subject, read our section on “Living with a clawed cat”.
Ready for a DIY project? Below are some examples of scratching posts you can make yourself and customize to suit your cat’s preferences.
COUCH COVER
Not only does this option protect your couch and let your cat sharpen their claws, you can also use it as a tray to hold your book or drink!
- Take the following measurements:
- The width of the arm of your couch
- The distance between the floor and the top of the arm of your couch
- The distance from the top of the arm to the seat of the couch
- Use these measurements to cut three boards to the right size.
- Sand all the boards so your kitty doesn’t get splinters.
- Attach the boards to each other at 90° angles to form a corner.
- Take some sisal rope and wrap it around the leg of the post that runs down to the floor. Use strong tape or glue to attach the rope.
Click here for more detailed instructions.
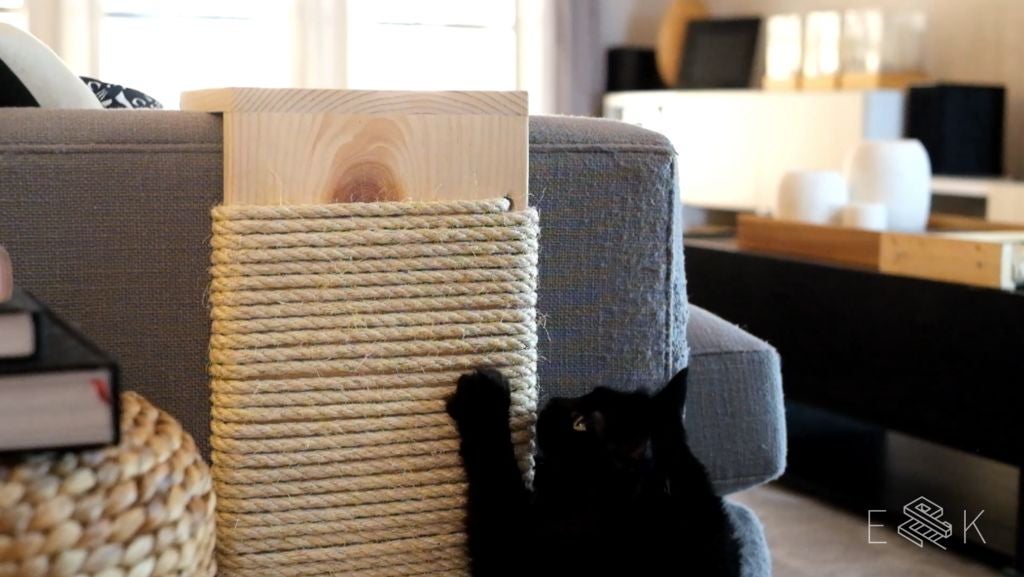
SCRATCHING POST
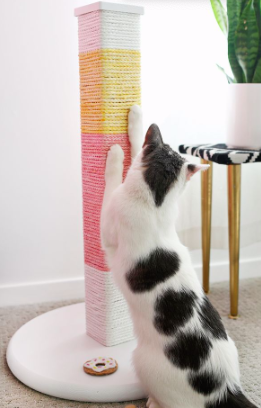
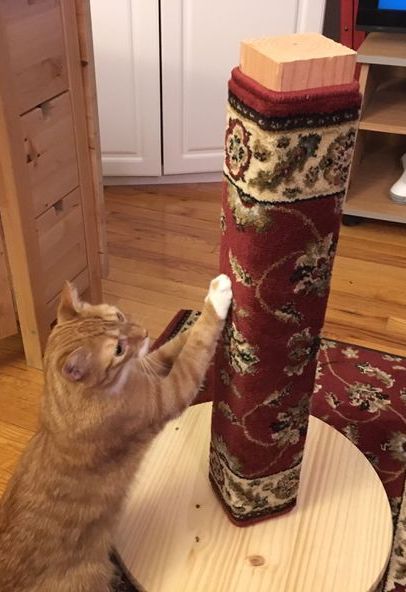
This classic style of scratching post is simple and can be tucked discretely into your space so your kitty can scratch to their heart’s content. Make sure the base is heavy or large enough that it won’t tip over when your cat uses it, and don’t forget to place it in a strategic location!
- Mark a point in the middle of your base.
- Secure the post (you can use an old table leg) to the middle of the base using screws and glue if needed.
- If you want to add some flair, you can dye the rope with food colouring. Don’t use any other type of dye that could be toxic to your pet.
- Take some sisal rope and wrap it around the post. Use strong tape or glue to attach the rope.
If you don’t have any rope, you can use carpet!
Click here for detailed instructions on the first version.
Click here for detailed instructions on the second version.
If you get your hands on a traffic cone, this is a cute, original idea!
WALL SCRATCHING POST
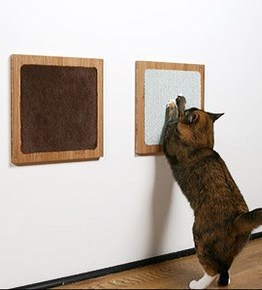
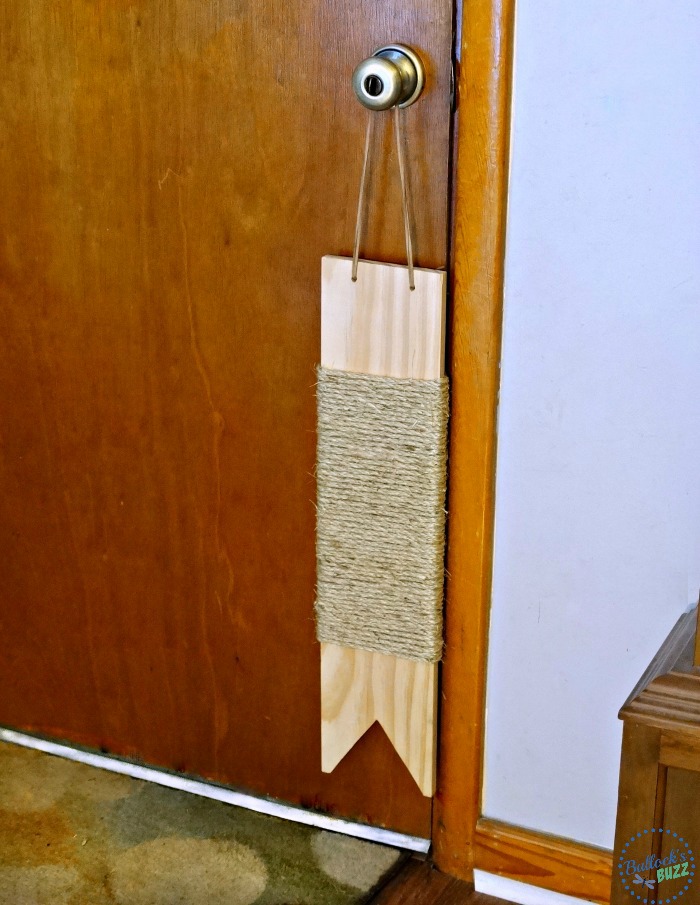
This is great option if you don’t have a lot of space. Make sure you hang your wall-mounted scratching post at the right height so your cat can get a full-body stretch when they use it to sharpen their claws.
- Cut a piece of sanded wood or thick cardboard into the shape you want.
- You have two options for the scratching material:
- Glue a piece of carpet to the board/cardboard.
- Wrap sisal rope around the board/cardboard. Use strong tape or glue to attach the rope.
- Hang your creation securely on the wall or a door. If you decide to hang the scratching post on a door handle, stabilize it by taping it to the door with double sided tape or screwing it in place.
Click here for detailed instructions on the first version.
Click here for detailed instructions on the second version.
Click here for detailed instructions on the third version.
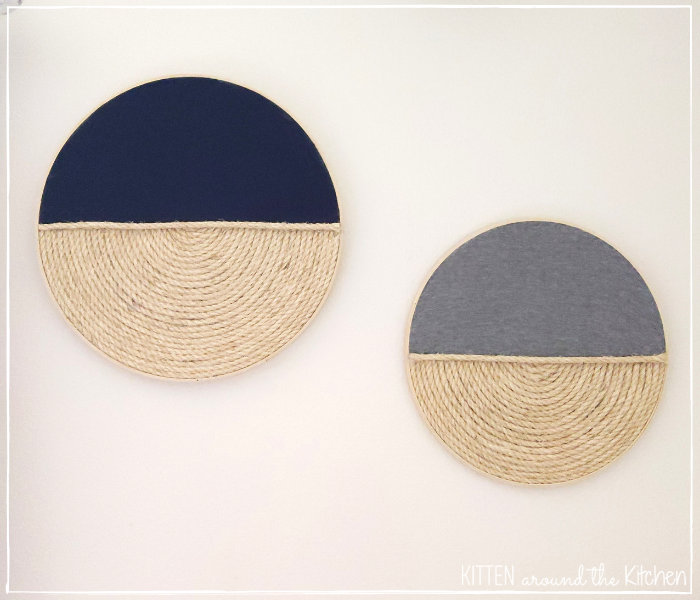
SCRATCHING PAD
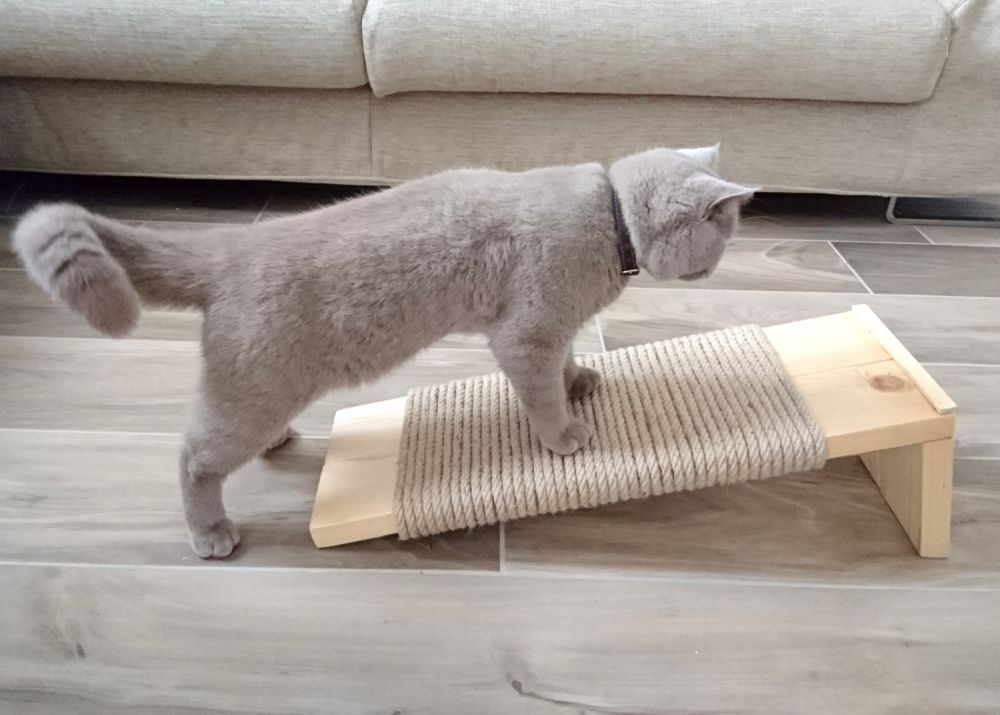
This scratching pad is sloping, but it can also lay flat on the floor. You can attach it to the floor with double-sided tape or Velcro.
- Cut two boards so that one is shorter than the other. Cut the end of each board at an angle so the scratching pad will sit at a slope.
- Make sure the boards are well sanded, so your cat doesn’t get hurt.
- Glue the two boards together at an angle.
- If you want, you can paint the structure fun colours.
- Take some sisal rope and wrap it around the scratching pad. Use strong tape or glue to attach the rope.
Click here for more detailed instructions.
CARDBOARD SCRATCHING PAD
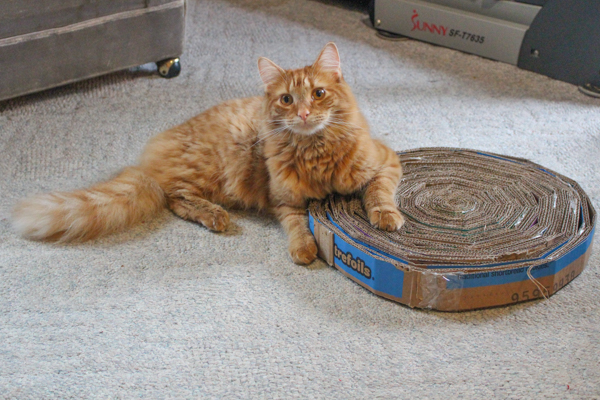
If you have some cardboard boxes lying around the house, this is the perfect project for you!
- Cut your cardboard boxes into strips that are two inches wide.
- Put some hot glue on one side of each strip, roll the strips into a tight circle, and hold them for a minute until the glue dries.
- Continue to hot glue strips to the outside of the circle until it is the size you want.
- Once you’re done adding strips to the scratching pad, wrap a few layers of tape around the outer edge to hold it in place.
Click here for more detailed instructions.
Grab your scissors and craft supplies and have fun!